

This handout was inspired from Elder Robert D. Hales' talk, "Our Duty to God: The Mission of Parents and Leaders to the Rising Generation". I have five daughters, and my oldest just turned 12, so this message was particularly poignant to me. Elder Hales talks about really understanding the hearts of our youth, and important things we should be doing to "grow together in a bond of faith and friendship that will allow you to strengthen each other and stay on the gospel path forever, to indeed be an eternal family." The photo above shows my little articulated doll holding that quote - which is referring to participating in Personal Progress and/or Duty to God with our youth.

This paper doll is meant to help remind us that our listening ears, loving words, active hands, and walking examples allow us to fulfill our “imperative duty to help youth understand and believe the gospel in a deeply personal way.”
You will need the following supplies:
downloaded file (click here to get pdf)
8.5 x 11" white cardstock
scissors
small hole punch or exacto knife
7 silver mini brads per doll

You can find the mini brads at most scrapbook stores, or in the scrapbook section of some department stores. I plan on cutting and assembling just one doll that I will use to teach the lesson. I'll then give the sisters I visit teach an uncut printed sheet with a little bag of brads that they can use to assemble in their own time.

One suggestion for assembly: give a good press to the back of the open brads to allow for a snug fit against the paper. The appendages will stay where you place them better if the brads are not wobbly in their holes.

You could, of course, color your doll if you like - or just leave her as is with her little red heart in hand.
Idea taken from http://visitingteachingblog.blogspot.com


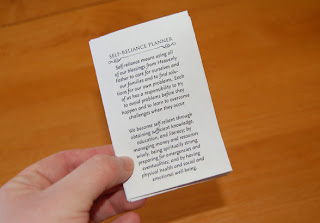 The Visiting Teaching Message for January is about self-reliance. Since January is also the month of resolutions, I made a little goal planner intended to help us think about the ways in which we can improve our self-reliance. The nice thing about the size of this little planner is that it fits into a pocket or a purse so nicely, which makes it easy to take out and ponder from time to time.
 The planner is made from one sheet of folded paper. No glue or adhesive is required.


 Your paper now looks like this.
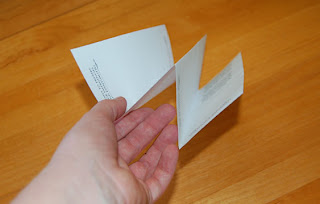 Place the paper on the table so that you see a W when you look at the end.
 Cut the center of the W along the center fold. You'll be cutting through two layers of paper and stopping at the cross fold (This is marked with a dotted line on my downloaded file.)
 Hold the center point of the W together on both sides so the cut middle section falls open. Let the backs of the planner pages meet each other. You will have an open book with 4 double-sided pages at this point.
 Find the front page of the planner, and bring the remaining three sections to the back, so you have a flat book.
